
From Sale to Scan: How to Create a Professional QR Code Ticket Scanner in WordPress
Selling tickets online is just the first step. The real challenge for many event organizers begins at the door. Fumbling with printed lists, checking names, and trying to prevent fraud can lead to long queues and a frustrating experience for your guests. But what if you could streamline the entire process with a system that’s fast, secure, and incredibly professional?
Fortunately, you can. By integrating a WordPress QR code ticket scanner into your event website, you can turn every customer’s smartphone into a secure ticket and your own device into a powerful check-in station. In this guide, we’ll show you exactly how it works.
Before we dive into the “how,” let’s talk about the “why.” Moving from paper lists to a digital scanning system offers several huge advantages.
Firstly, it’s incredibly fast. Scanning a QR code takes a fraction of a second, which means your entry lines will move much more quickly. Secondly, it’s highly secure. Each QR code is unique to an order, and once it’s scanned, it cannot be used again. This completely eliminates the problem of duplicate or fraudulent tickets. Finally, it looks extremely professional, giving your attendees confidence in your event from the moment they arrive.
A complete QR code system has three essential components that must work together seamlessly.
- Automatic Ticket Generation: The moment a customer buys a ticket, the system should automatically generate a unique QR code for their order. This code needs to be delivered to them instantly, both on the “Thank You” page and in their confirmation email. For instance, our [Live Event Seating plugin][link to your plugin’s main page] handles this entire process in the background.
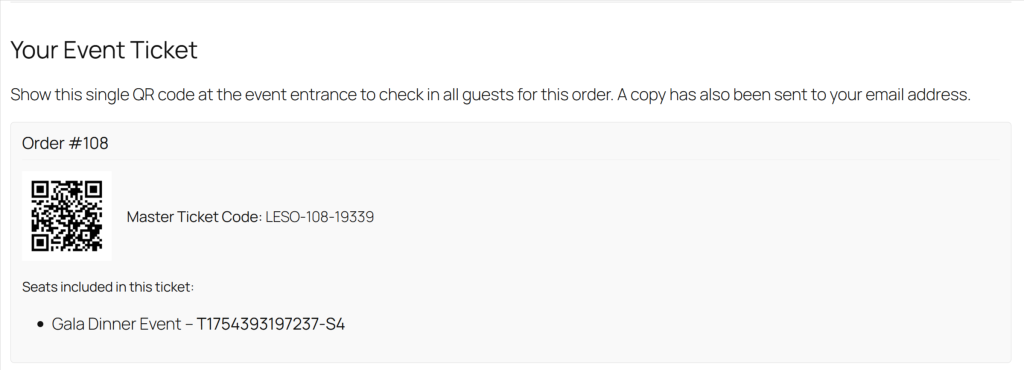
- A Clear, Scannable Ticket: The customer’s ticket—whether viewed on their phone or printed out—must be simple and easy to read. It should prominently display the QR code, along with essential details like the order number, customer name, and a list of all seats included. A “Print Ticket” button is also a fantastic addition for user convenience.
- An Easy-to-Use Scanner: On the day of the event, your staff needs a simple tool. They shouldn’t have to download a separate app or use expensive hardware. A great system, like the one included in Live Event Seating, provides a “Ticket Scanner” page right in your WordPress dashboard. Staff can simply log in, navigate to the page, and use their phone or laptop camera to scan tickets.

When a code is scanned, the system should provide immediate feedback:
- ✅ Success: A green confirmation message appears with the guest’s details, and they are marked as “checked-in.”
- ❌ Already Used: A red warning shows that the ticket has already been scanned, preventing re-entry.
- ❓ Invalid: An error message appears if the QR code is not from your system.
Moreover, having a manual entry field is a crucial fallback for cases where a screen is cracked or a printout is smudged.
Implementing a WordPress QR code ticket scanner is no longer a feature reserved for massive arenas. With the right tools, you can bring this professional-grade functionality to your own events, creating a smoother experience for everyone involved.
If you’re looking for an all-in-one solution that handles everything from visual seat booking to final check-in, check out the features of our Live Event Seating plugin.